.png)
Adding a New Property
In this section, we will go through everything you need to know about adding a new land property to your website.
If you prefer to watch how to add a new property on your REI Landlist WP Theme, you can do so here:
UPDATE This video refers to the Land menu, and has now been renamed to Properties
Go to Properties > Add New in your WordPress dashboard.
Note In this tutorial, we edit the posts using the preview mode (live editor) however, if you prefer, you can switch to 'Edit' mode, which will let you edit the text in HTML, by clicking on the pencil which appears at the top of a block once you click on it. To switch back to preview mode, click the eye icon, as you can see below:
Adding a new block

To add a new block, click the button and select the block which you require.
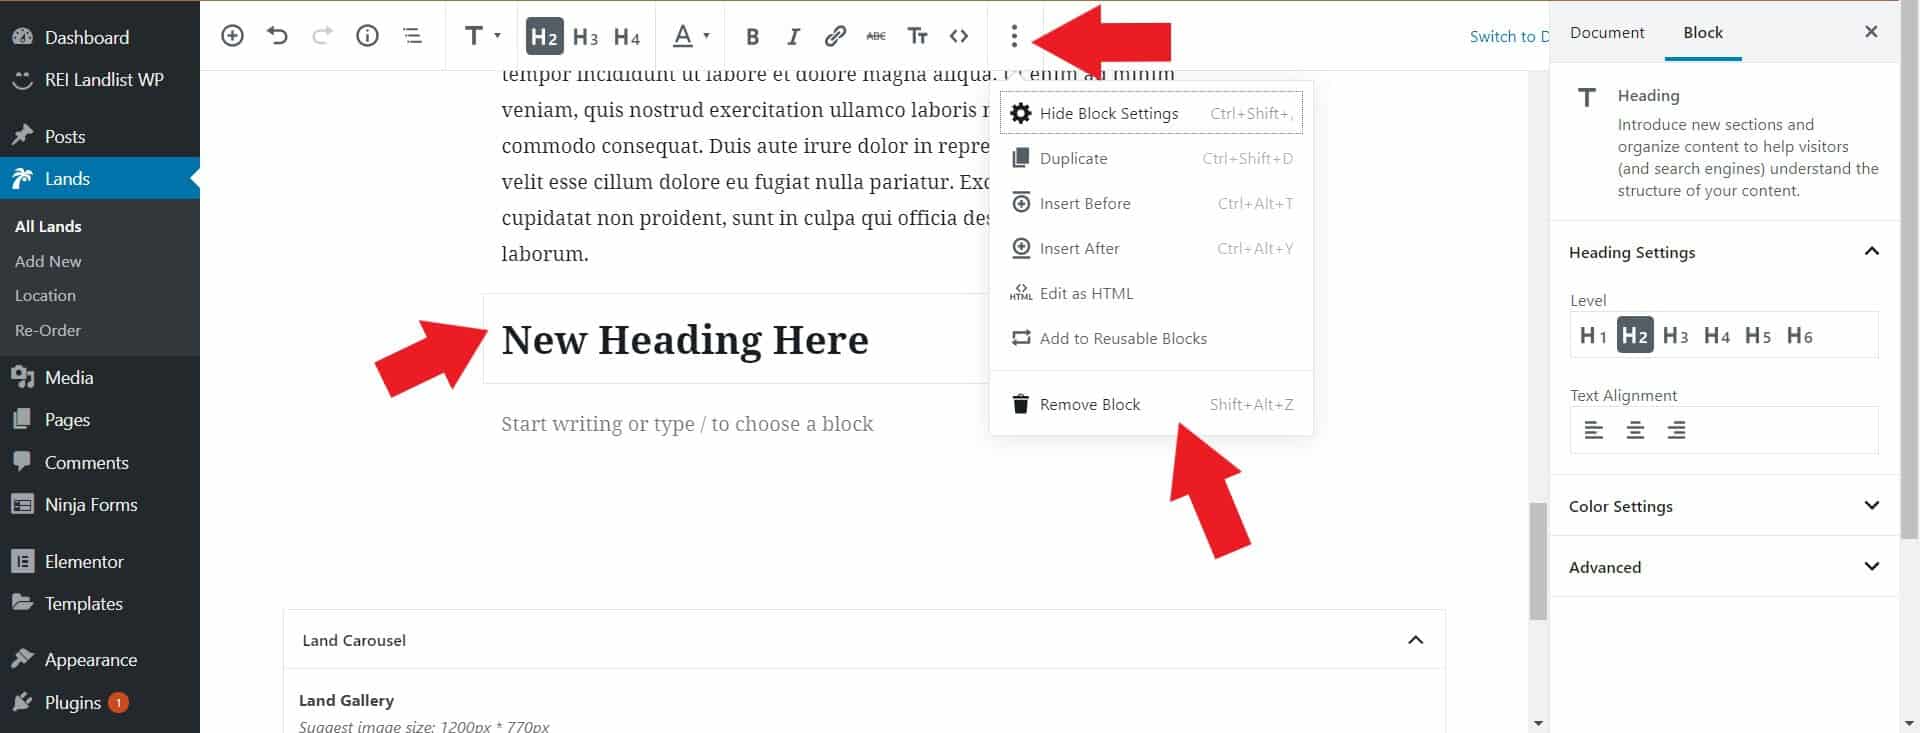
Removing a Block
If you want to remove any of the blocks, click on the block, then click the 3 dots on the block settings. At the bottom you will see the option to remove the block.
Reordering Blocks
To re-order a block, click on it, and to the left you will see the following icons.

The up arrow will move the block up a notch, the down arrow will move it down a notch, or, you can click on the 6 dots and drag and drop it to a place of your choosing.
Duplicating a Block
To duplicate any of the blocks you have been working on simply click on the block, and then click on the 3 dots on the block settings, you will then see an option to Duplicate.
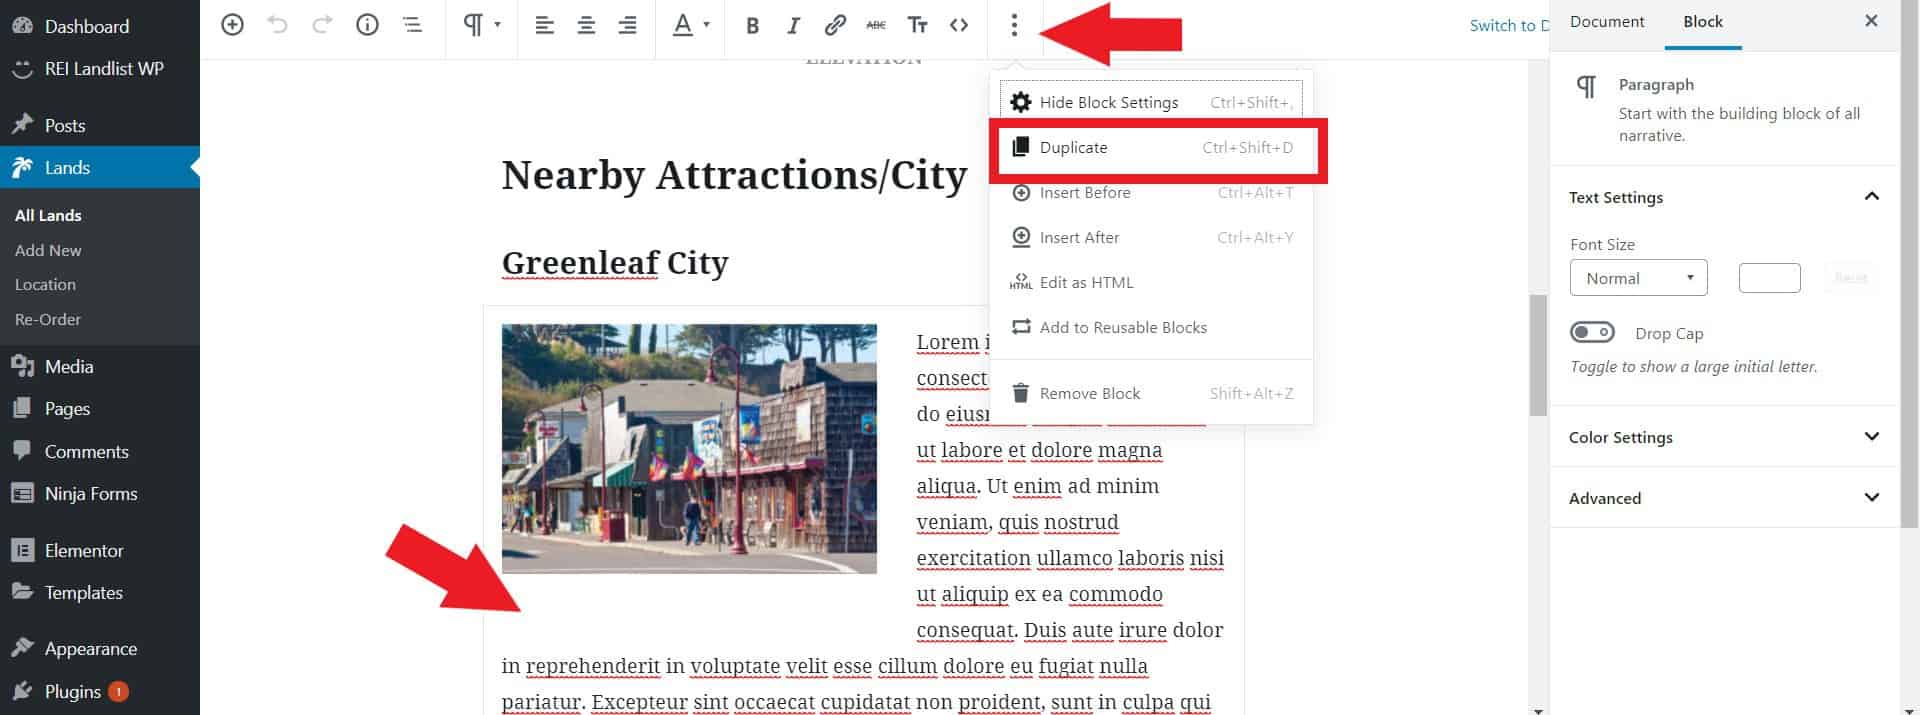
This feature is particularly useful for the Nearby Cities/Attractions block, which as there may be more than one area you wish to feature. We discuss this particular block in more detail below.
Title
This is the title of the property and will appear on the main property page, as well as at the top of the specific listing. Create a title that briefly describes your property, adding keywords if possible.
You can edit this directly in the text box.
Headings
When you click on any of the headings that we discuss below, you have the option to change them to H2, H3, H4 etc., add links, make the headings bold or italic and even insert code.
Hover over the different icons to see their function. Heading block options also appear on the panel on the right under Block.

To see even more options, such as duplicating the box, click the on the button on the right.
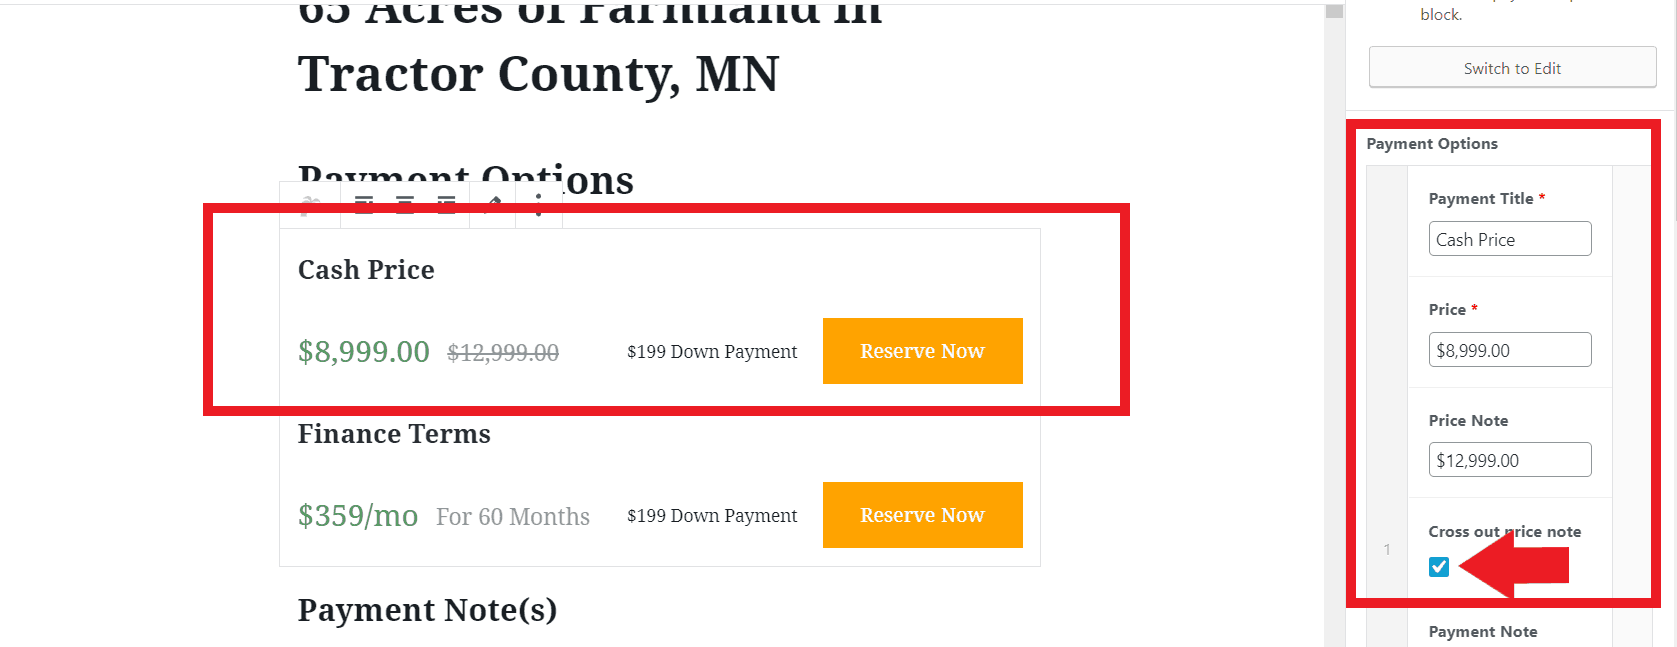
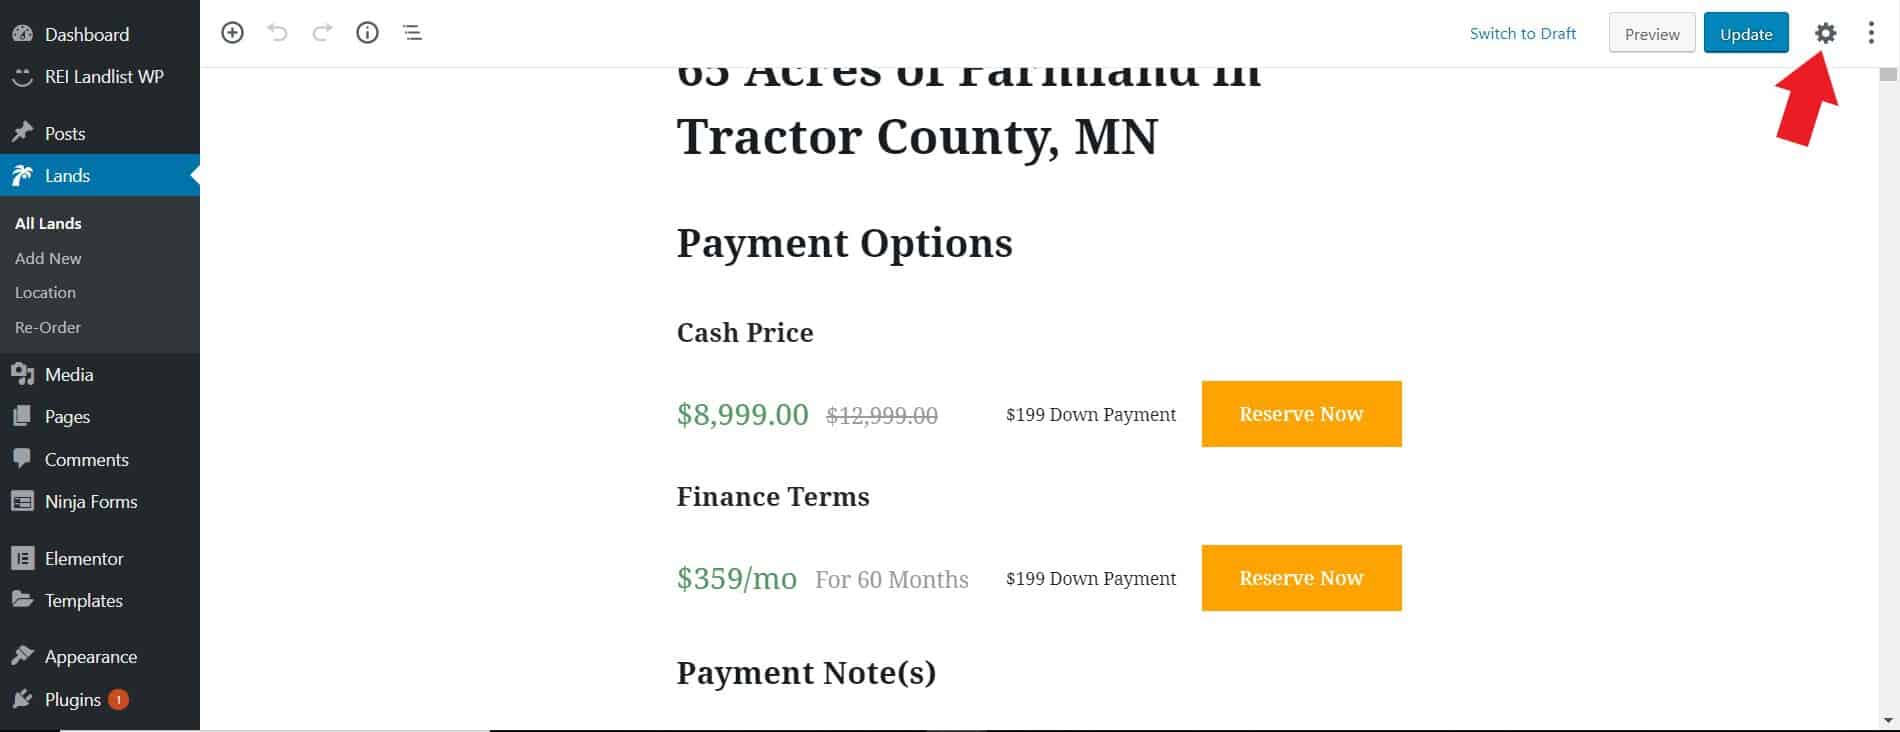
Payment Options
This is where you list all the payment options available for this particular property. Payment options are customizable to whatever you desire. For sake of simplicity, our demo content uses Cash Price, Seller Finance, and Rent.
When you select the block, the tab on the right hand side will have boxes for you to fill out in order to show the price.
You also have the option to show discounts. To do this, put the original amount in the Price Note field, put the current price in the Price field and check the box for Cross Out Price Note.
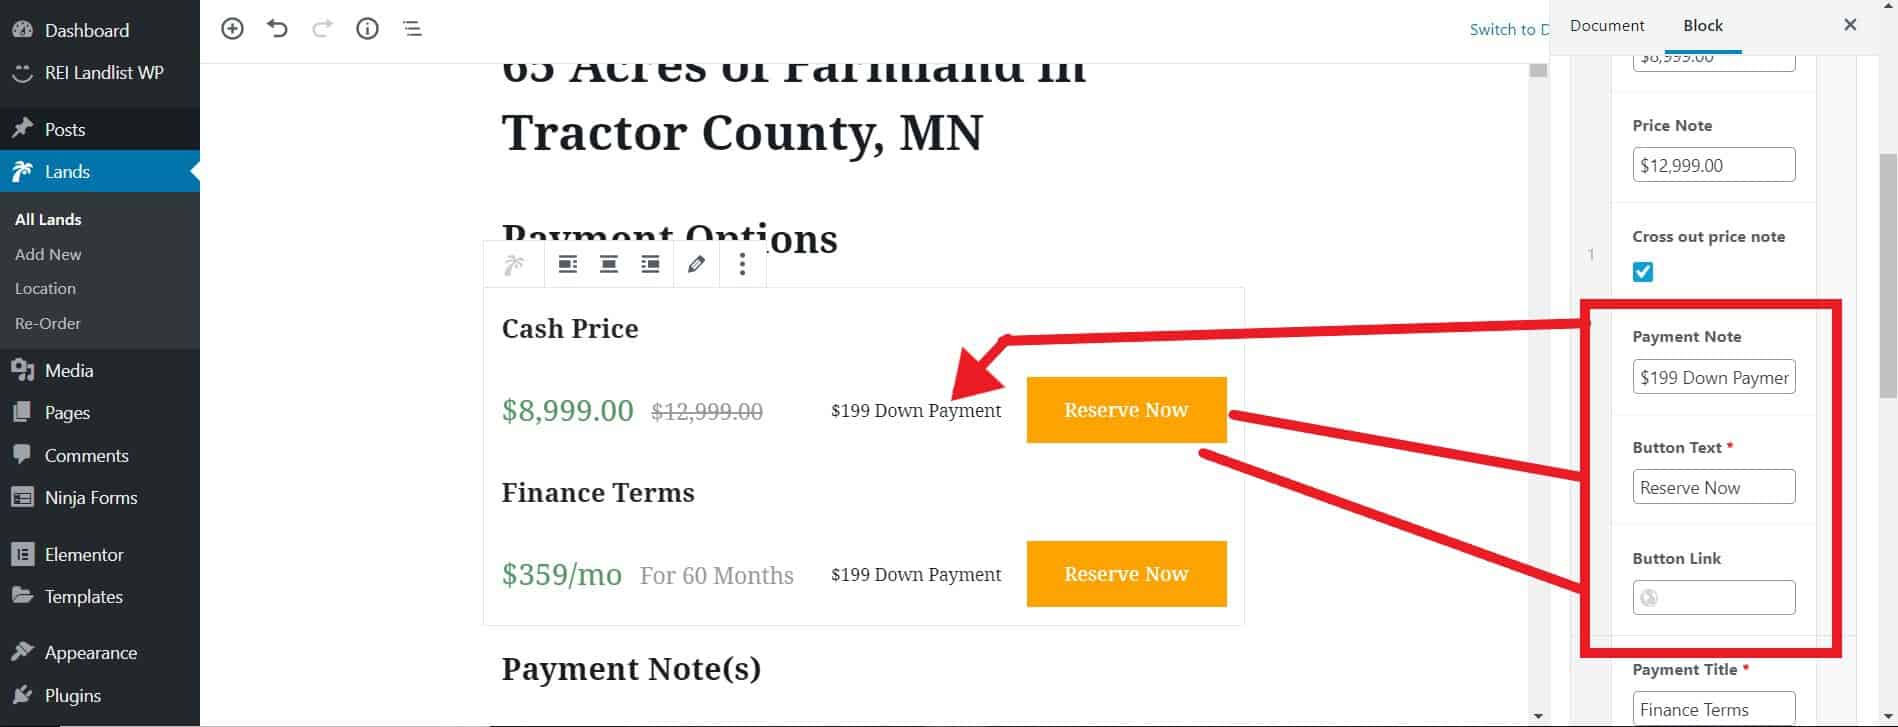
Under Payment Note, list anything the buyer may need to know, such as down payment information which is shown in the example.
Next, modify the button text of the Button and insert the link of the page you would like the buyer to be directed to when they click it. For simplicity sake, we've use the word "Reserve Now" for our button. Feel free to use any call to action terms like "Buy Now", "Pay", etc.
You can also update the Button Options to display your own, custom made buttons. Select Custom Button. Under Button Format, select Image. Then, click the button to change the image. The button will update in the live editor.

REI Landlist WP allows you to link your button to any checkout page handled by payment processors that you use to collect payments. Please make sure to check with your payment processor if they allow for Real Estate Property transactions.
Alternatively, if you do not want to use online payment processors, you can link the button to an email address. To do so just enter "mailto:youremail@email.com" and replace youremail@email.com with your own email address.
Repeat the above steps for all the payment options you have, for example, financing options, as shown in this example from the demo.

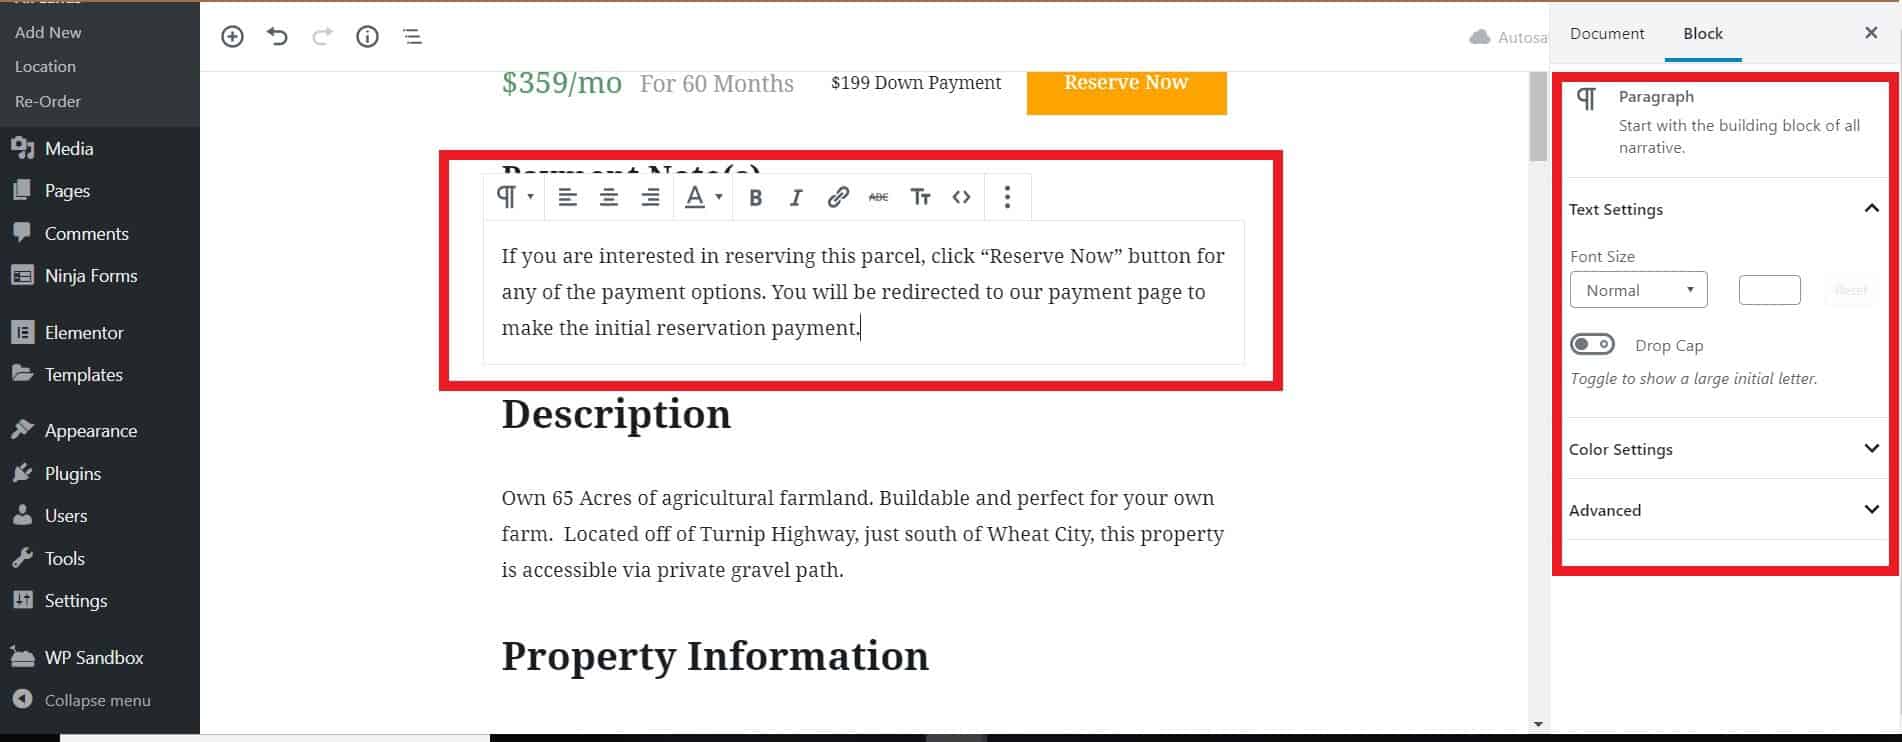
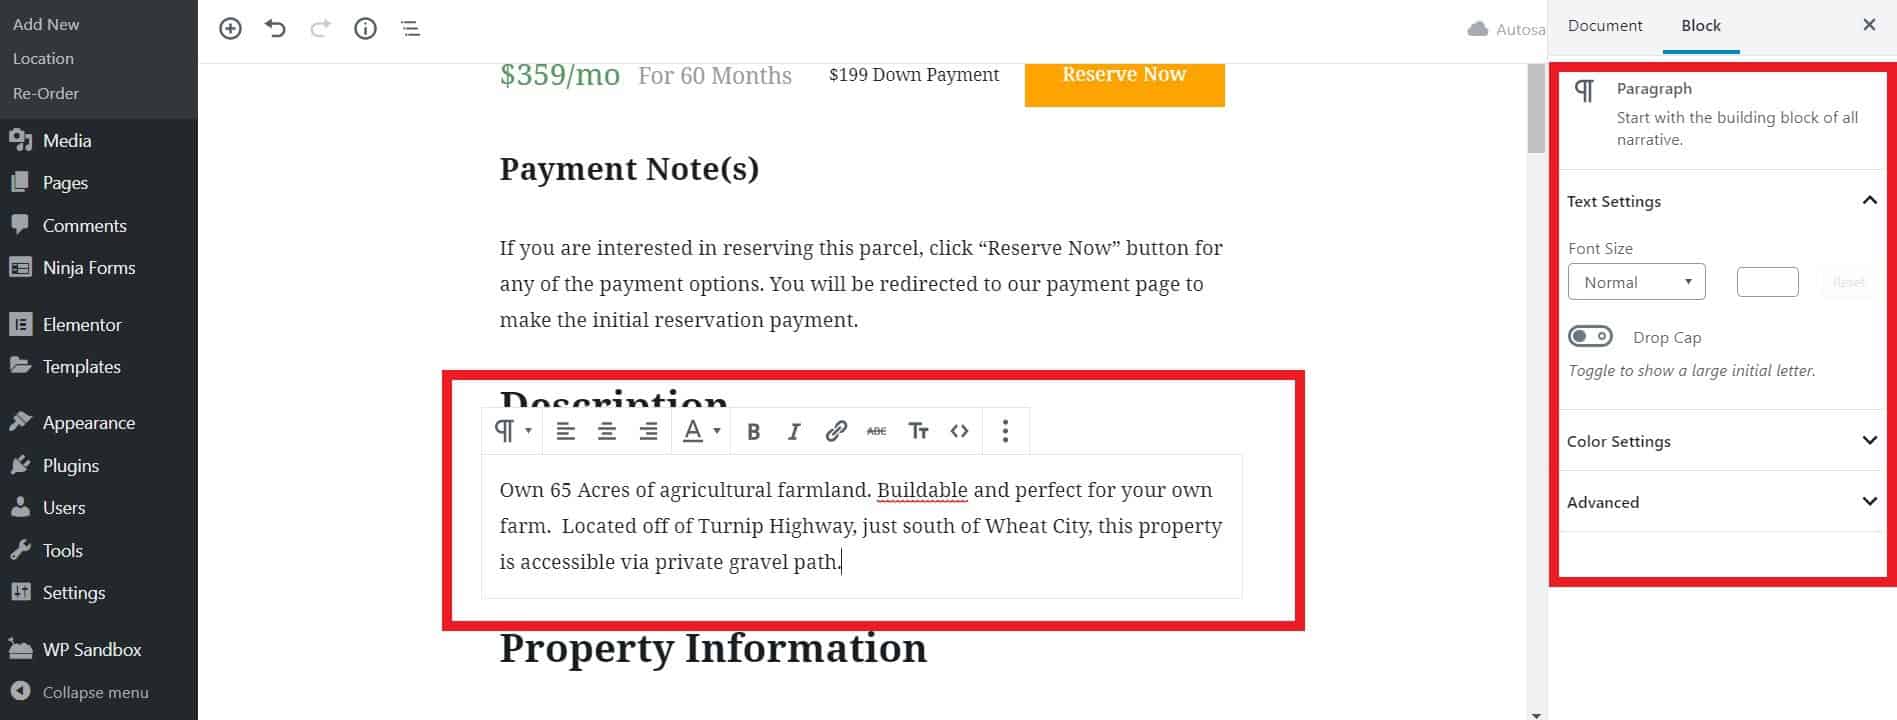
Payment Notes
Use this space to add any additional payment notes or instructions for your customers. You can just type straight into the box.
To format any of the text, use the bar that appears to the top of the box once you click on it, or use the blocks panel to the right.
Description
Here you write a description of the property you are selling. Ensure it is keyword rich and has all the key features of the property to attract buyers.
As with the text box above, you can enter text straight into this block, and format using the bar that appears at the top of the block or in the blocks panel to the right.
Property Information
For this section, you will need to edit the information in the Block panel to the right.
You have the option to put the land size, the state, county, the nearest cities, parcel number, address of the property, legal description and a custom field
Any section which you leave blank will automatically be removed.

Adding a Custom Field
To add a custom field, click on the blue button

Enter in your desired information and it'll appear in the live preview. If you want to add more custom fields, just click Add Custom Field again.

Features
The features section allows you to add key information about your property in an easy to read format.
As with the other sections, simply fill out all the fields that you want to be featured on the page, in the blocks section on the right.
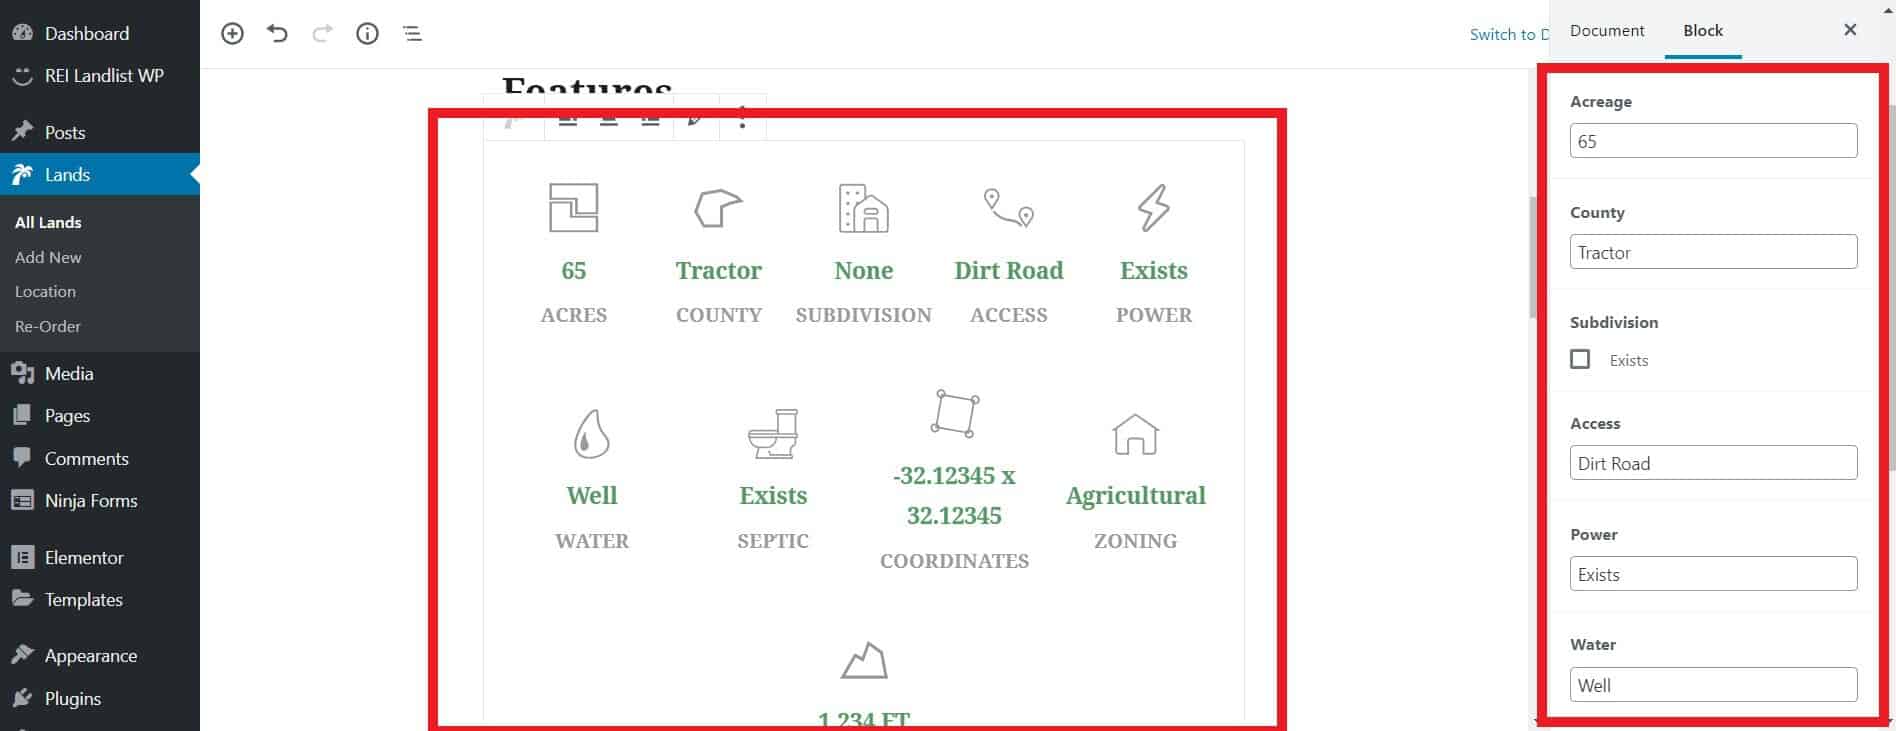
There's also an option to add custom features too. Click on Add Custom Field, then enter all the details you want to include. You can also upload your own icon too, though it's set to a house as default.

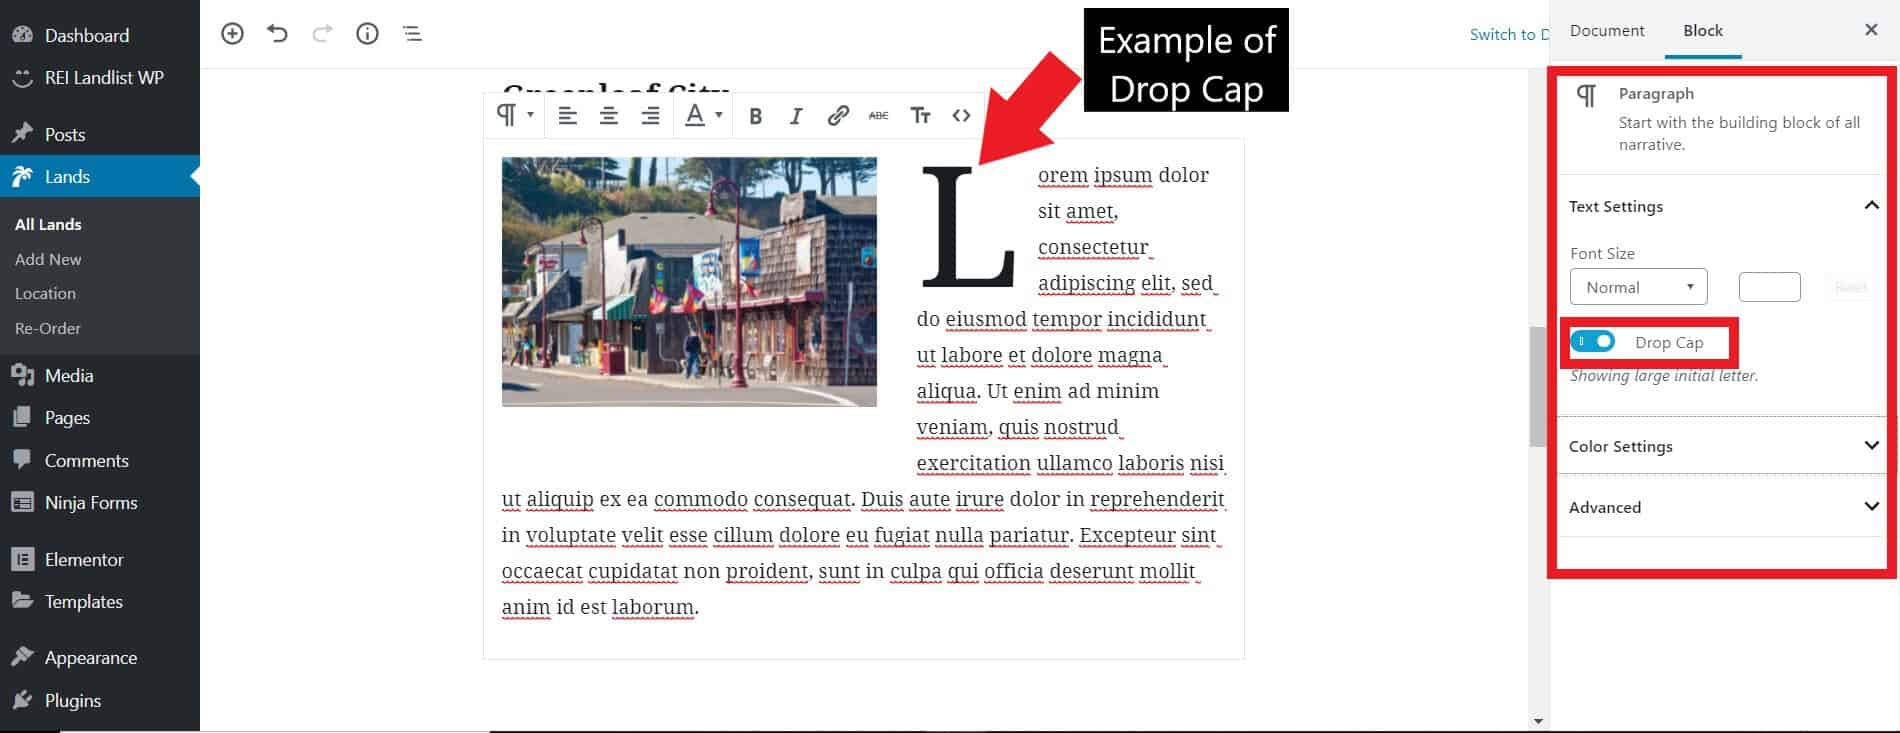
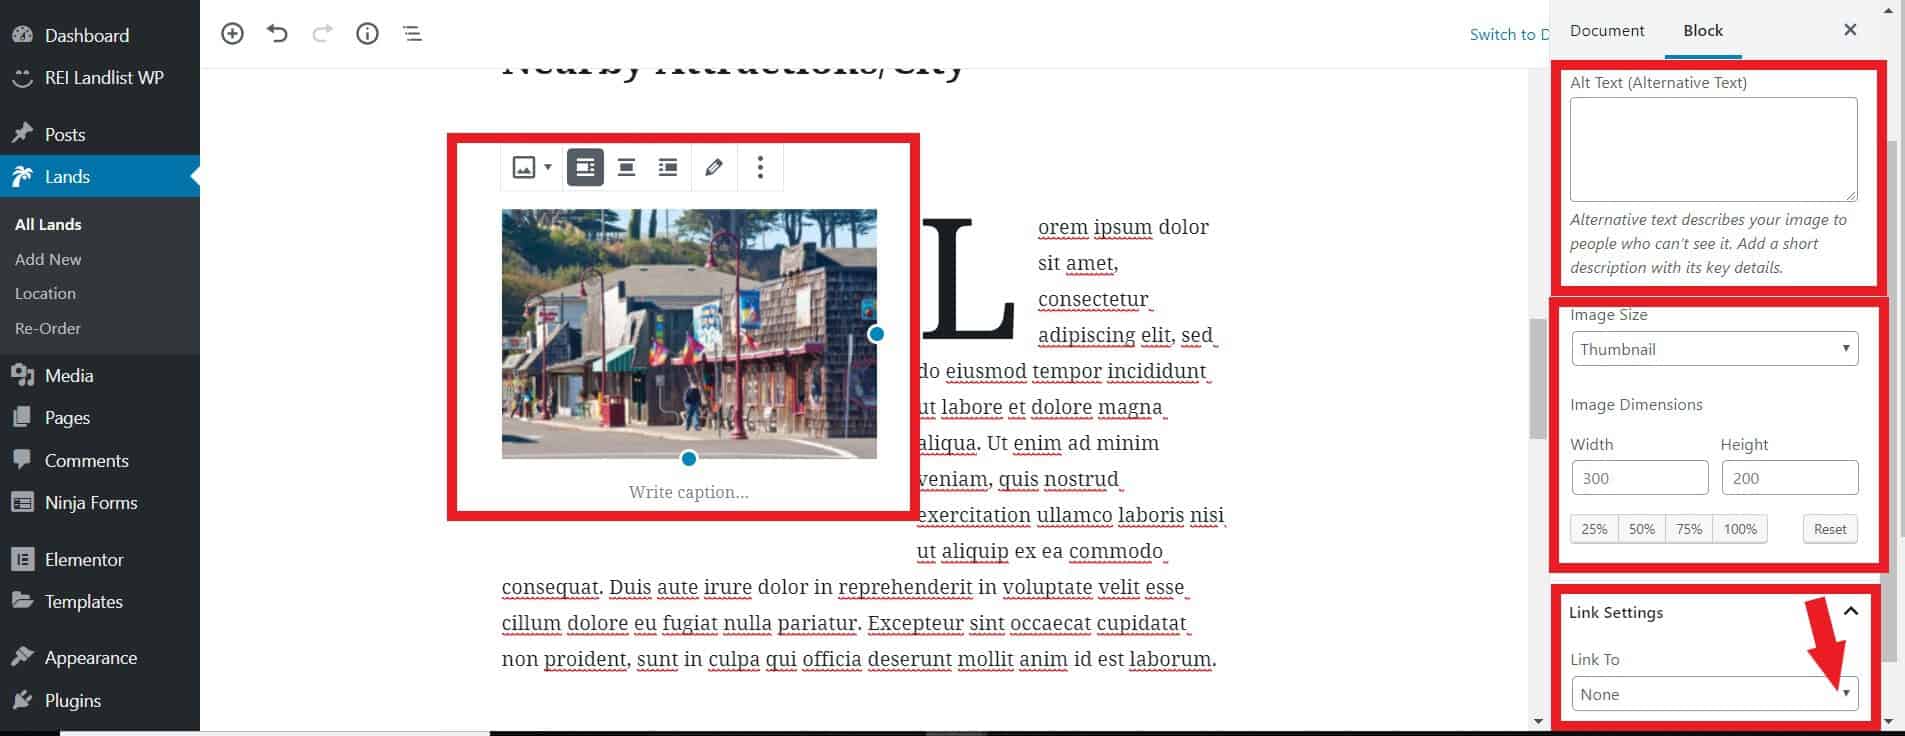
Nearby Attractions/City
This section allows you to talk about the closest cities to the property and their attractions.
Simply click on the block and you can easily edit the text directly.
In the block section to the right, you can change the Font Size and Color. For added effect, if you want to use a Drop Cap, simply toggle the button.
To edit the picture, just click on it. A small box will appear above it. Click on the pencil button to upload your new image.
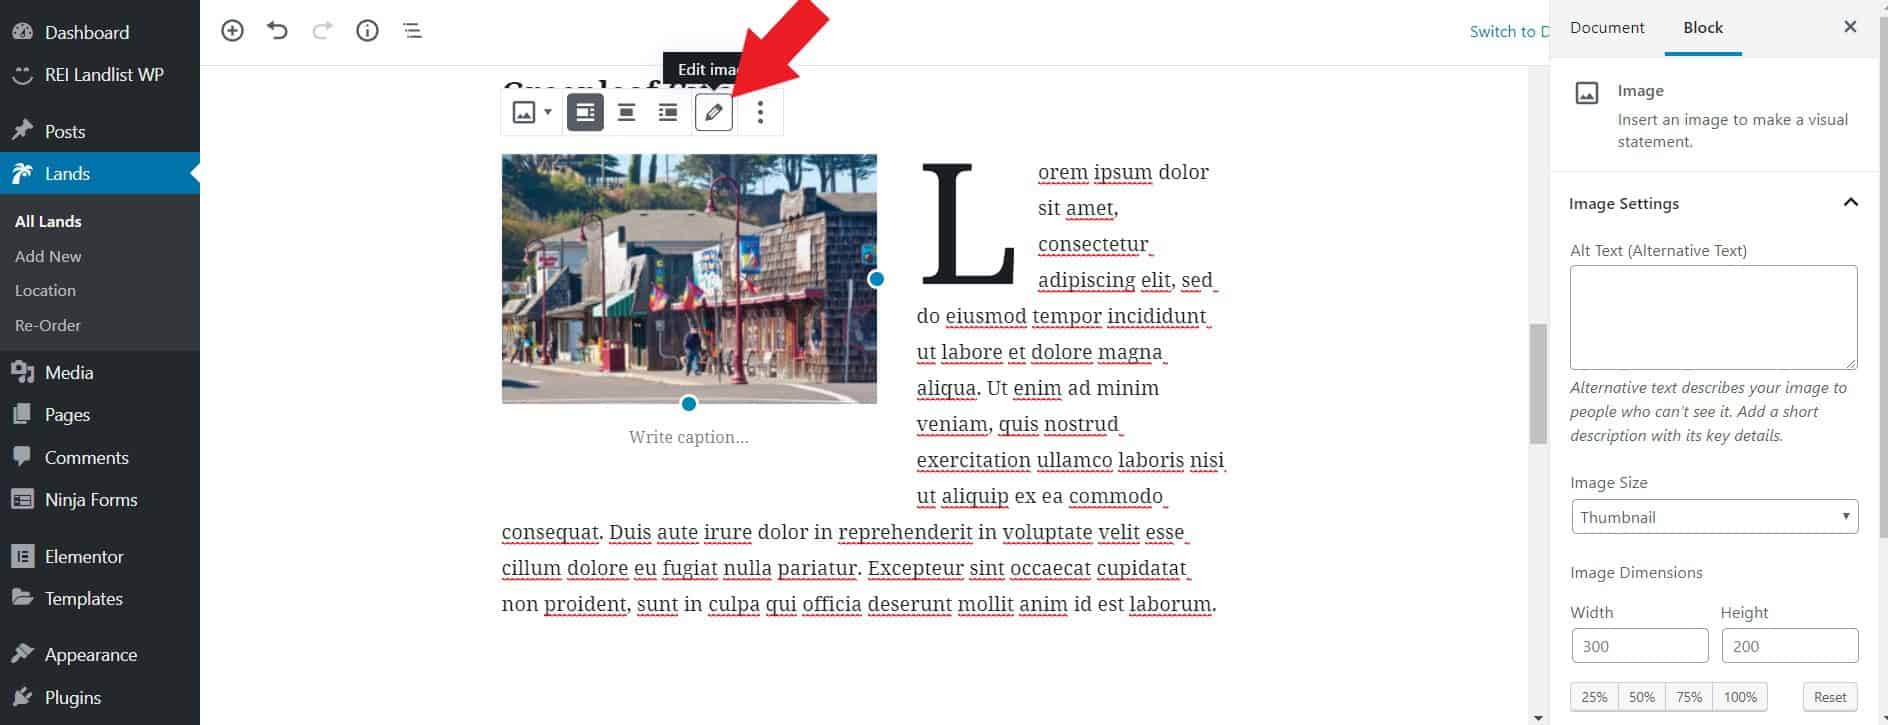
Use the block section on the right to add extra details to your image.
The Alt Text is how you describe your image and helps search engines rank your website.
Below this you can select your image size. A 300 x 200 pixel size has been selected as a default and is recommended. Alternatively, you can quickly select 25%, 50%, 75% or 100% of the original image size.
Finally, you can add a link to your image if you wish. Under Link Settings, click link to, and you can select to either link to a site, another media file (such as a downloadable of the city, for example), or, another page on your site.
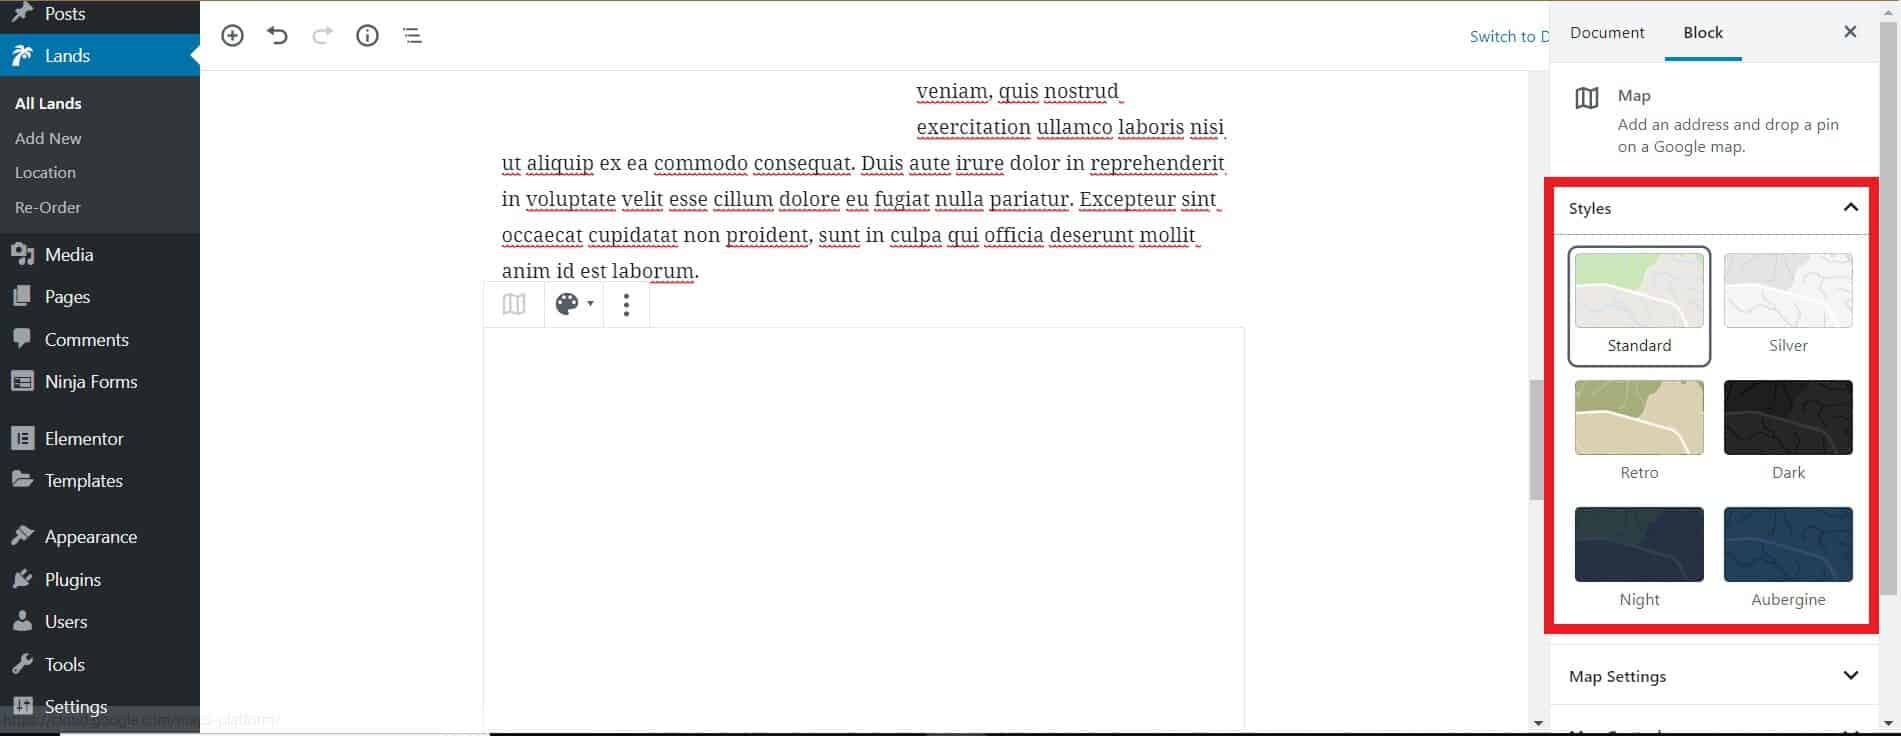
Maps
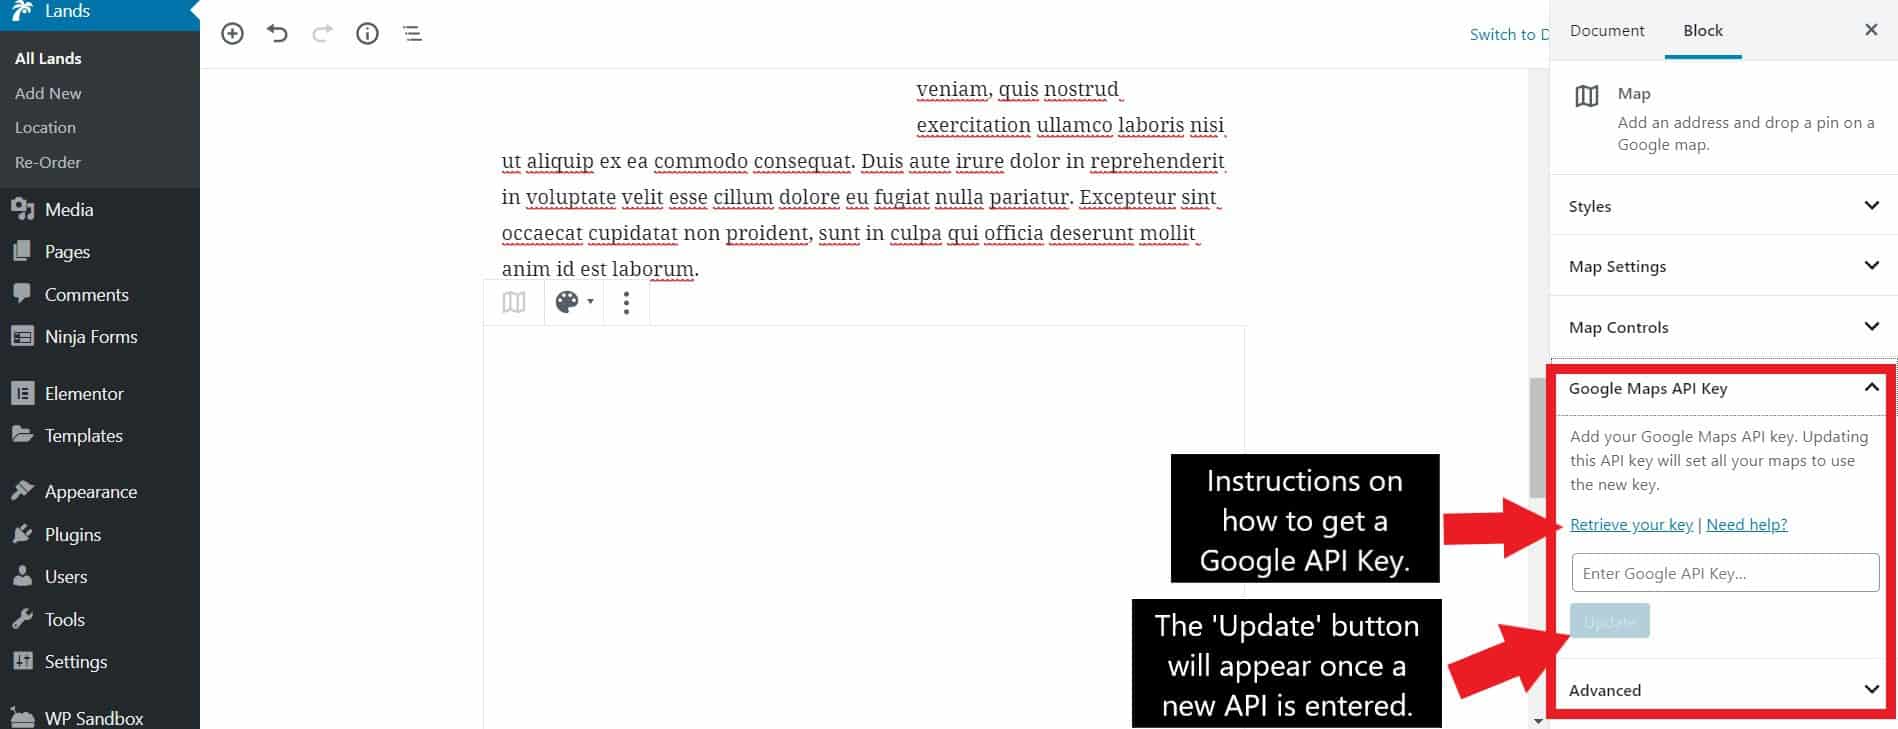
Note: In the screenshots, the map is not visible in the preview, this is because no API Key was entered, you can see more about the API Key below. Under our Business and Lifetime plans, feel free to book a meeting with us to walk you through to setting up your Google Maps API.
REI Landlist comes with a Google Maps feature to showcase the exact location of your property.
There are several customizable options for your Google Map, all of which are accessed through the blocks section on the right, once you have clicked on the map block:
Styles - Use this to select the how your map is displayed.
Map settings > Address - here you can write the town and state of your property.
Map settings > Zoom Level - scroll this to control how far your map is zoomed in or out.
Map settings > Marker size - scroll this to control the size of the marker that.
Map settings > Height in Pixels - Use this to control the height of your map.
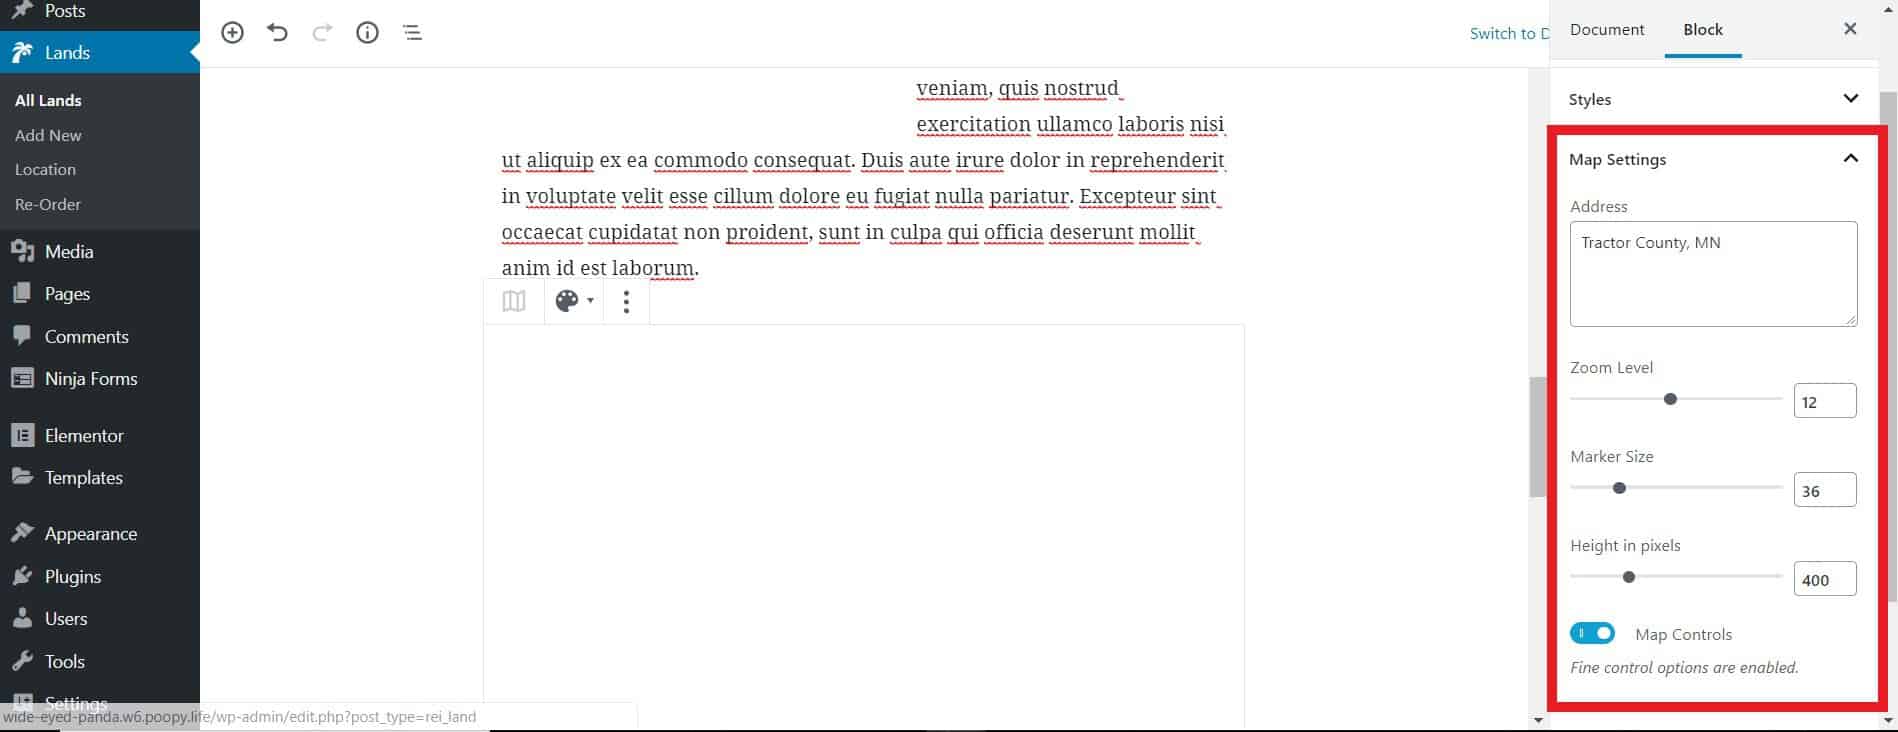
Map Controls - here you have several toggle options which allow you to show the zoom controls, street view, full screen and satellite/standard switch options on your map. We recommend activating all of these for a better user experience.
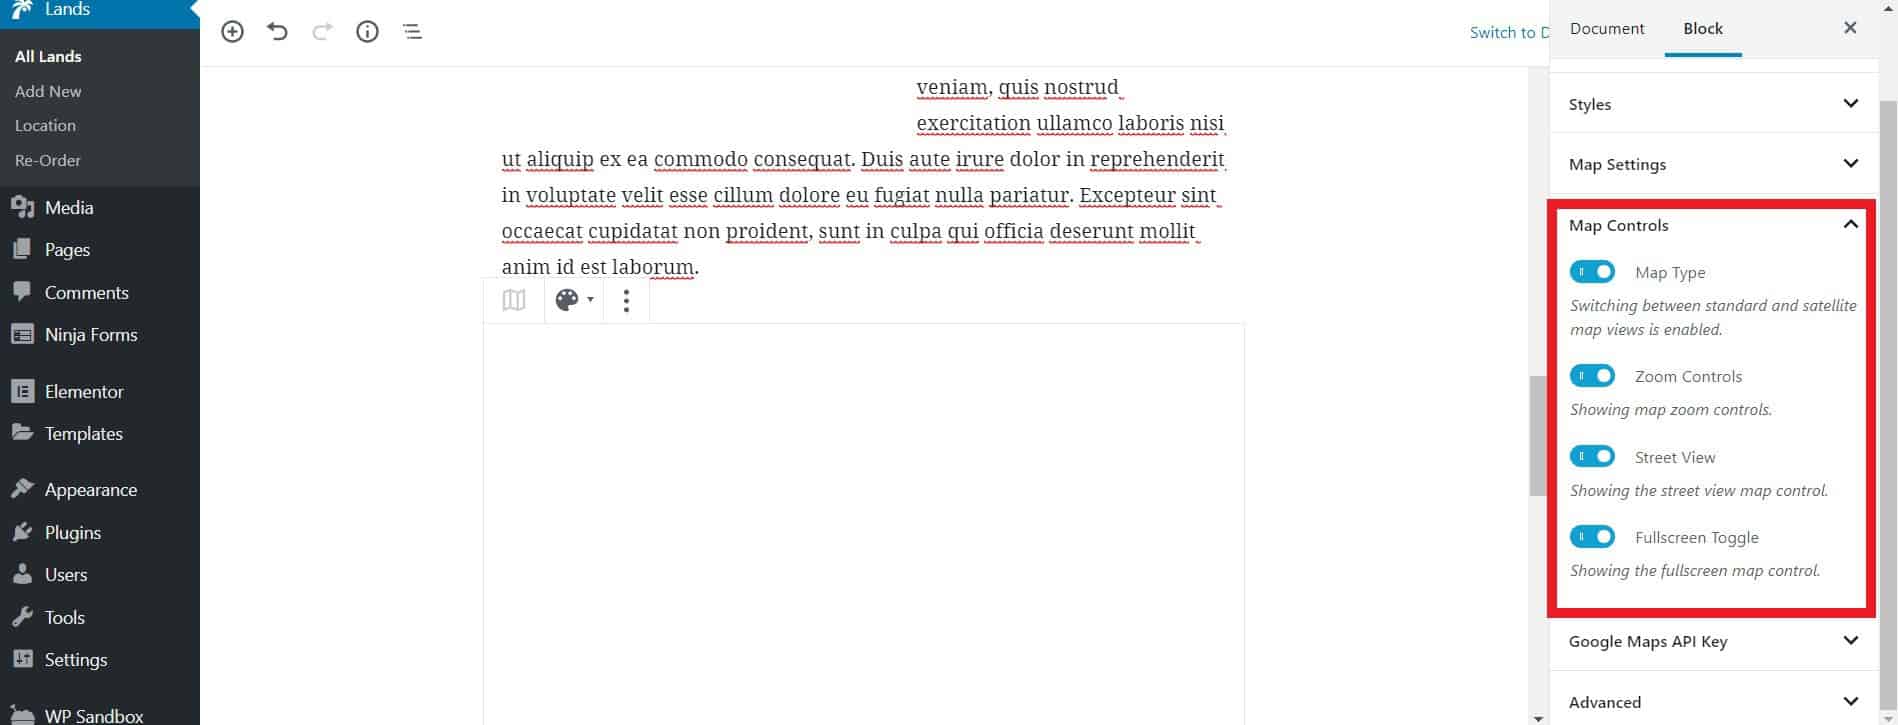
Google Maps API Key - this is the most important part when it comes to configuring your map as without it, the map won't display correctly on your website. To get help retrieving your key, just click on the link and Google will give you a step by step walkthrough.
Notes
Here is the space where you can write any additional information about the property for sale. As this is a text box, you can write directly into it in 'live edit'.
If you want to and change the font, styles and color, head to the Block section to the right of the page.
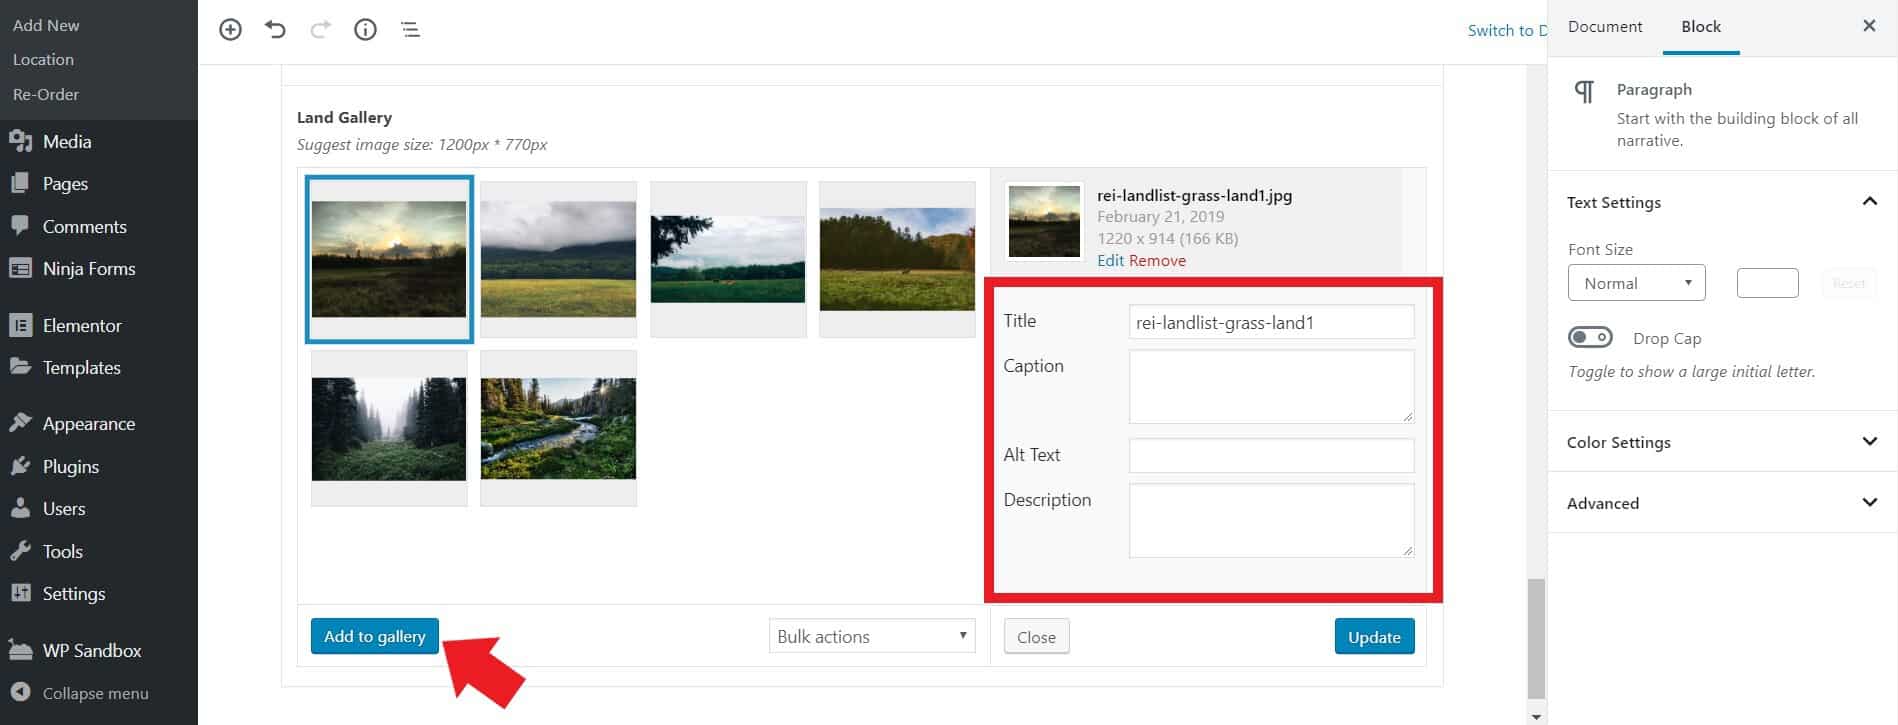
Property Gallery/Carousel
This feature allows you to have a gallery carousel that appears at the top of the page.
To add photos to the gallery, click on Add to gallery and upload your images through the WordPress uploader.
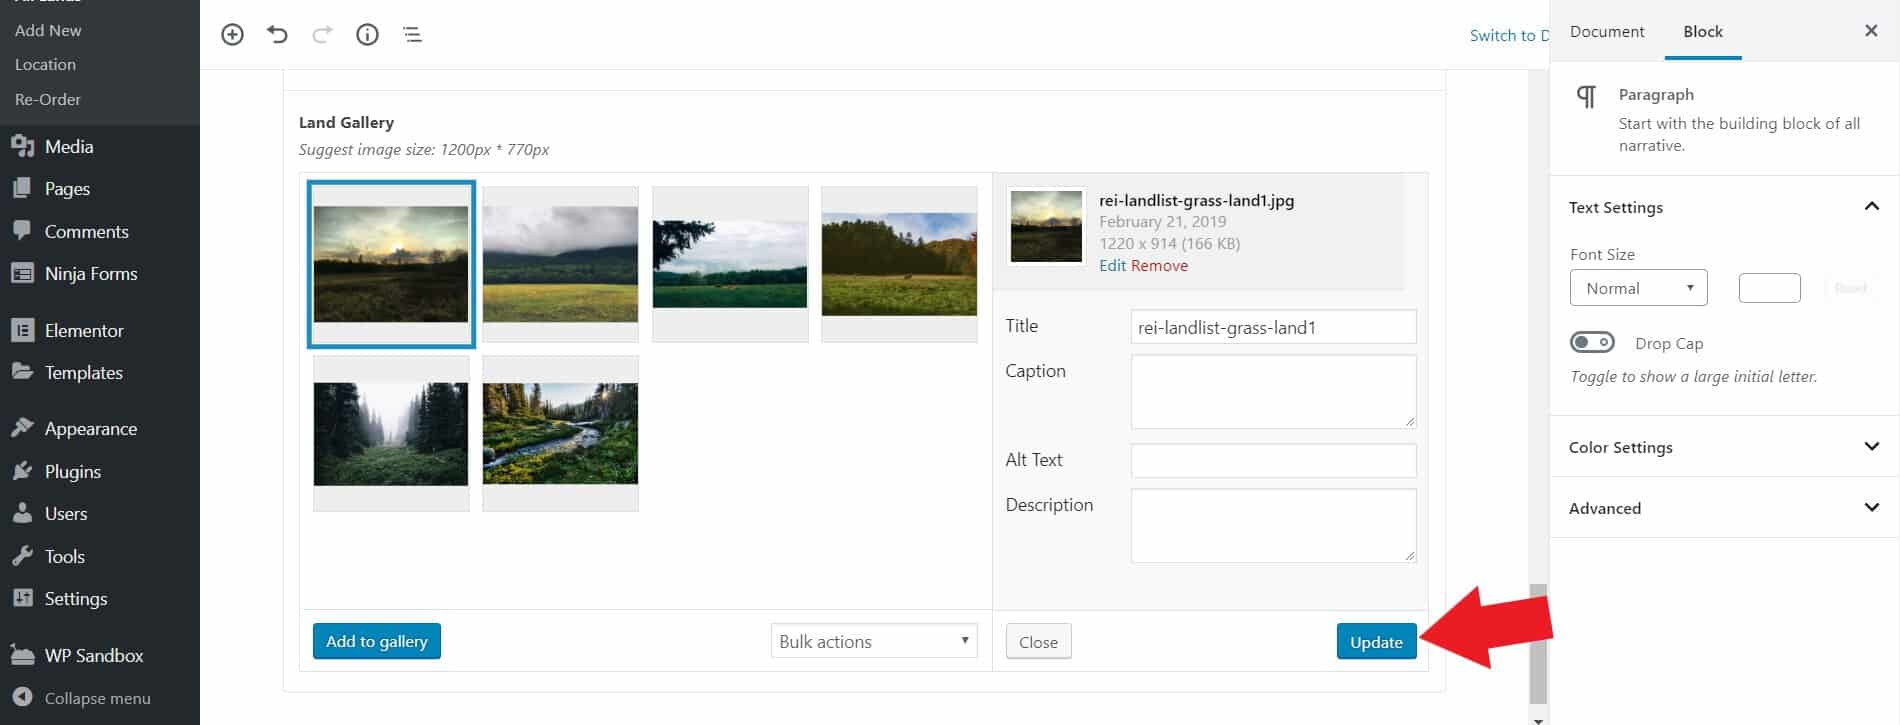
To the right of the block you have the option to add a title to your image, add a caption, alt text and a description. Though all your readers will see on the front end is the caption, we recommend filling out all the texts boxes for SEO purposes.
When you're done adding the pictures, click Update to save and then press Close to close the carousel.
How to Save and Publish the Section
To save your work you may need to close the Block/Document Tab so that the Update button shows up.
Click on the 'X'. In the top right corner, you will now see a Preview and Update button. Click Update to save your changes.
If you want to bring the Block/Document tab back up, just click on the settings cog and it will reappear.
In the next article, we will look at the Document Tab, which helps you add more information to your properties.